Yesterday, I mentioned all the gardening projects I worked on in the morning. But. In the afternoon, when it got to hot to be working outside (unfortunately, lately it doesn't take much heat to be too hot for me). I turned on the air conditioner and went inside to work on my current sewing project.
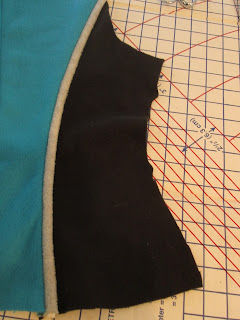
I'm sewing a couple of fleece jackets using McCall's #7026. I usually have a hard time finding commercial patterns I like. For some reason, I found SEVERAL patterns I liked this year. I had some odds and ends of polar fleece. That's right, I'm a polar fleece hoarder. I decided this pattern would make good use of them. The pattern called for commercial piping. I wanted to use some of the polar fleece I already had and make my own so it would co-ordinate with the yokes.
It's a super simple process, so, I thought I would share it with you......
You'll need these supplies to make your piping:
Cording
Knit fabric (you can also make piping from woven, but it must be cut on the bias)
Ruler
Scissors (or rotary cutter)
Fabric marker
1. Figure out how wide you need to make your fabric strips by measuring around the cording. Mine measured 3/4" To that measurement add 2x the seam allowance. My seam allowance was 5/8", so 2x that amount equaled 1-1/4" plus the 3/4" for a total of 2".
2. Measure and cut your knit strips. Make sure the stretch of the fabric will go with the width (2") of the fabric. The length should be a little longer than your pattern piece. My longest pattern piece measured 20", so, I cut my pieces about 22".
3. Place your zipper foot on your machine (set so you will be able to sew up against the cording). Fold the knit fabric width (2") around the cording with cut edges together (your right side of the fabric should be up and the wrong sides next to cording). Make a few stitches across the end to anchor the fabric and cording together.
4. Turn and begin stitching the length of the knit fabric, keeping the stitching close to the cording and the edges together.
To use your piping, sew on the right side of your fabric piece, matching seam edges. Stitch right on top of your previous piping stitching.
Trim seam and finish seam as desired. If using an overcast seam (that's what I do), make sure to REMOVE the zipper foot and return to an overcast foot (ask me how many needles I broke before I remembered to do this!). Press your seam to one side (edgestitch, if desired). YAY! You're done! It wasn't that bad, was it?
Well, I'm off to work on the rest of my jacket. I've already decided I'm changing the order of some of the pattern directions. I'll post my changes in case you want to know what (and why) changes I'm making.
Happy Sewing!
Lori


No comments:
Post a Comment